Good Bye From LittleBritishCar.org

Leave a comment

The cars have been sold and I am going to close this site down soon.  Thanks to everybody who has read these pages and contributed in the past. 

If anybody is interested in the LittleBritishCar.org  URL, or would like to take over this BLOG, please contact me at inim_mini@yahoo.com 


Project MGB and MG 1100 FOR SALE

Leave a comment

I have decided to sell both the MGB project and the MG 1100. I am asking $3,500 firm for the MGB with all the parts I have collected over the past two years (including V6 engine, CCC conversion kit with headers, T5 five speed, etc)

I am asking $7,500 OBO for the MG 1100.

Bodywork

3 Comments

There is a lot of debate regarding the application of body filler, specifically whether it should be applied over bare metal or over epoxy. Some say that the mud absorbs moisture if it is applied directly to the metal while others say that it bonds better to metal than epoxy.
I have talked to quite a few experts and I have come to the conclusion that it is a matter of choice. The old timers resist change and new technology, which is probably why many of them refuse to wear fresh air ventilators while working with catalyzed paint and isocyanides. These people will probably be dead soon so we will finally have a consensus on how to do things.
In the meantime, I will go with the recommendation of the paint and filler manufacturers and put the filler on top of the epoxy. But only after the panelbeating was done.
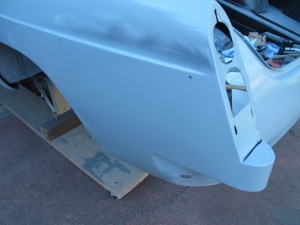
The rear and sides of the body required a significant amount of bumping because I learned to MIG weld on this project so there was some warpage due to my inexperience in working with sheet metal. Fortunately, I did quite a bit of research ahead of time and learned the importance of stitch welding, so it wasn’t too out of control.


I am also learning how to do bodywork on this project so my experience is limited to what I have learned from watching reruns of American Hotrod, Overhaulin, and a bunch of DVD tutorials that I purchased – more on that later! Like a lot of beginners, I learned all I could ahead of time then went out and purchased every bodywork tool known to man only to find out that I have a favorite dolly and spoon that I use for the majority of work. The other fancy stuff merely makes me look important and gives me street cred if somebody happens to look in my toolbox! But only to other newbees. I will post more on the sheet metal work when I do the door and front fenders.


So, after applying the epoxy a few weeks back it was time to start working with fillers. I am using a combination of Rage Extreme on the flat surfaces and a reinforced fiberglass filler on the areas that need more strength, such as door jamb edges.

Assuming the filler is properly mixed and applied, the most important thing that I have found is learning proper sanding techniques: always use a the longest practical block, sand in a cross pattern, use a guide coat, and let the sandpaper do the work. It is tedious work but the results are good so far.

The edge of the door jamb had a dent that somebody made worse by rounding it off with a body hammer. I got it fairly straight then made a dam using plastic strips, duct tape, and small pieces of wood. The reinforced glass filler was applied against the dam, which was removed after the filler cured. This gave it a beautiful edge which, after block sanding, gave a perfect edge that matches the rest of the door jamb. I did the same thing to the frenched license plate edges.

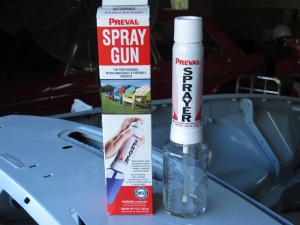
The next step was to apply epoxy over the filler and areas that were sanded to bare metal while working with the filler. Since I was only working on a few small areas and I didn’t feel like dealing with all the spray equipment, I decided to use a Preval sprayer. For those of you not familiar with them, Preval sprayers are basically a jar with a replicable propellant canister. You mix your own paint, put it in the jar, and spray it like a rattle can. But unlike a rattle can, they are very efficient and inexpensive. One canister will spray about twelve ounces of paint and I only paid $4.99 at Home Depot.

Although I have used Prevals for spraying acrylic enamel and lacquer on a Vespa that I restored, this was the first time I have used one for primer. I was very impressed with how nicely it laid the primer down -vs- rattle-can primer. No comparison whatsoever.

Sprayed Epoxy Primer Today!

Leave a comment

After several months of procrastination I finally sprayed epoxy on my MGB project today. I used Southern Polyurethanes epoxy primer which was sprayed using a TP Tools Showtime Turbine sprayer with their Proline 1 quart pressure feed gun and a 1.8 needle and nozzle combination.

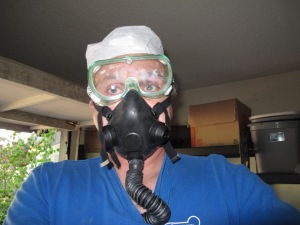
Since the epoxy is a two stage catalyzed primer which is made with a lethal dose of isocyanides – and I hope to live at least long enough to see how this project turns out – I used a Hobbyair II supplied air respirator which I purchased from the Autobodystore website. Is it just me or does this remind you of Frank Booth from Blue Velvet? Maybe I will figure out how to rig some nitrous into this puppy! Overall I am very happy with the way it turned out. This was my first experience painting a car and I couldn’t be happier with the results. The TP Tools Showtime sprayer is everything that they claim and more. It is super easy to use and there is VERY little paint waste and overspray! I have a long way to go in terms of bodywork but at least the metal is now protected with epoxy so it wont rust.

Bodywork Progress

Leave a comment

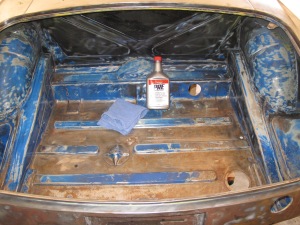
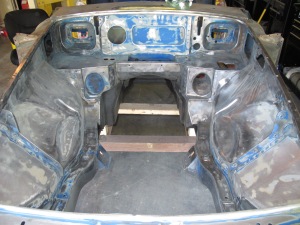
Having been neglected for several months, the bare metal on my MGB was starting to form a light surface rust in a few areas. Cool weather is quickly approaching and the Epoxy will not adhere if I wait too long. I have been putting off this project for quite a while but I finally decided to bite the bullet yesterday and break out the chemicals and sandpaper. It is either now or next summer. The first area I attacked was the trunk. I had wire brushed the hell out of it a few months back using a wire cup and DeWalt hand grinder. I hand sanded everything smooth yesterday then cleaned it up with an application of Eastwoods Pre surface cleaner. I followed it up with a brushed on application of their Rust Encapsulator. Although I originally intended to use the rust convertor, there was no rust left after I sanded and cleaned everything up. The Rust Encapsulator went on easily with a cheap disposable paint brush from Home Depot. I applied three coats and it dried with a nice finish, although I intend to follow up with Lizard Skin or a similar product. I then went to work on the engine bay using an electric DA sander from DeWalt and 80 grit discs. This chews up the discs pretty fast so I ended up spending a few hours hand sanding. I am still undecided on an engine bay color. I like the black engine bays that you see in muscle cars but body color looks nice too, especially after all the prep work! I knew that one of the rocker panels had bondo on it and that can mean two things: a dent or bodge rust repair. This is one of the things I have been dreading but I dug in and, to my delight, no rust! It was a small dent with about an inch of bondo! Although it will be a pain to pull out the dent and do it correctly, I am very happy that I don’t need to replace the rockers! Next was the interior. I spent a lot of time scrubbing the factory tar insulation and carpet glue off the floors and interior areas. Acetone works well for this but it is nasty stuff to breath. It still needs to be cleaned up a little more before I apply a little rust convertor. I plan on painting the inside with the Eastwood Rust Encapsulator followed by Lizard skin and some Dynamat. Like the trunk, the entire area will be covered in carpet and upholstery when it is finished. Overall, it was a productive day. My workshop is covered in dust, I am still buzzed from inhaling the acetone and rust encapsulator fumes, and have no fingerprints due to the sandpaper. It doesnt get better than that! It is going to be ninety degrees next weekend so it will be an ideal time to spray the SPI epoxy. I recently purchased the TP Tools
Showtime turbine sprayer that so many people have raved about so I am excited to try it out. I also purchased a supplied air respirator from Hobbyair, which will take some getting used to. I will post updates.

I am Still Alive

1 Comment

It has been several months since my last post but a lot has happened since then. We got a beautiful new house in the city of Napa – a 1957 California Ranch. The good news is that I have an 840 square foot garage and workshop. The bad news is that I don’t have much time (or money) to get anything done in it.
The MGB has been sitting patiently while awaiting a V6 transplant. Getting it to its new home was a chore since it is sitting on a rickety wood cart. After quite a few false starts I finally found a tow truck driver crazy enough to tow it. Following behind was both comical and terrifying! The bare metal is starting to oxidize so I will get some epoxy on it soon and post updates as soon as I can.

MGB Progress

Leave a comment

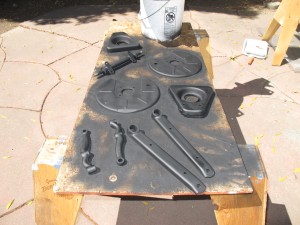
I have been making a bit of progress on the MGB. I managed to locate an early S-10 manifold and carburetor to replace the fuel injection unit that came stock on the Camaro engine. Unfortunately the carb is pretty rough but it only cost me about $20 with shipping so it will be a trade-in core if nothing else. The options are a rebuilt S-10 carb ($200 +/-), a Weber carb kit made for the early S10 ($325 +/-), or a 390 CFM Holley, which will require modification to the manifold. I will probably end up with a Holley. I also managed to locate a set of aluminum Fiero GT valve covers which really give the engine a retro look. I have been working on the suspension. Most of the parts have been beadblasted and painted flat black. I am adding urethane bushings and sway bars since the 1975 models didn’t come with them. Beadblasting is a tedious job, especially with an anemic air compressor, but I am happy with the results so far. I probably should have had the parts powdercoated but I kind of like the look of Rustolium flat black. Plus the price is right! The crossmember has also been painted in flat black and the UPS man delivered pair of a newly rebuilt swivel axles today. I am still in need of a pair of front cross members and a new front shock. With any luck it will be rolling soon!

2012 Hayward British Field Meet Photos

Leave a comment

2012 British Field Meet in Hayward, California took place on June 2nd.

Slide Show Link:  http://www.flickr.com//photos/96125796@N00/sets/72157630018522076/show/

Photo Link:  http://www.flickr.com/photos/96125796@N00/sets/72157630018522076/

Mickey Richaud’s V6 Transplant

Leave a comment

Mickey Richaud purchased this MGB GT from his friend Tony Barnhill’s estate shortly after Tony’s untimely death.   His journal documents the restoration and V6 conversion of the GT which is a wonderful tribute to Tony’s memory.   Tony was probably the world’s biggest MG nut and I am sure he is looking down with a smile.  The video below shows the moment we all dream about when restoring a car – the first startup.

CLICK HERE TO READ THE JOURNAL!

1994 Chevy Camaro 3.4L Engine

2 Comments

I picked up a 1994 3.4L engine from GM Sports in San Jose yesterday.   It came complete with everything, including fuel injection, the wiring harness, the ECU,  power steering pump, air conditioner pump, starter, and alternator.  In addition, I purchased a five-speed T5 gearbox, which came with the clutch, flywheel, shifter, bell housing, and slave cylinder.  Also included was the driveshaft and cross member, which I won’t need.

The first  challenge of the day was to get the thing out of the back of my Element without killing myself.  The cherrypicker came in handy for that.  I just lifted enough to take the weight off then drove the car forward until it was clear.

My first impression was that the lump was too large to fit in the MGB.  It looked HUGE with all of the auxiliary parts attached.  My second impression is that the fuel injection looks WAY too complicated.  I’ve done a lot of research on engine management and fuel injection but I am leaning towards a carburetor at this point.   While there is no doubt that fuel injection is a better fuel delivery system, I nevertheless prefer the simplicity of a carburetor.  Plus I want the engine to look like it belongs in the car and fuel injection is a dead giveaway.  I like modified cars that look like they came from the factory that way.  If an average person can point out the mods, they were not well planned in my opinion; you might as well get huge spinning chrome wheels and go on Pimp my Ride.

After stripping all of the auxiliary components from the power unit, it actually began to look like a V6 engine again.  Converting to a carburetor will require obtaining an Edelbrock manifold base, a modified (shortened) manifold adapter, a Chevy S10 distributor unit, and a suitable carb.  In addition, a cam swap may be required.   GM parts are, however, much more reasonably priced than their MG counterpart and available at my local auto parts store.

V6 Conversion in Progress

Leave a comment

I knew what I had to do the first time I ventured over to the British V8 website.  I immediately made up my mind to do a V8 conversion.  But after a fruitless search for a suitable 215 Buick V8 engine, I decided to put the engine swap idea on the shelf.  That was until I saw Harvey Lechti’s V6 conversion and did a little research.  It turns out that the Chevy/GM 60 Degree V6 engine is a near bolt-in conversion using a kit available from vendors such as BMC British Automobile, LLC  and also  Classic Car Conversions as seen below.  Although there is a lot of information on the internet, doing this conversion nevertheless requires a lot of research from several sources.  My goal is to make this information available in one place by documenting my research and conversion process on this website.

Image

Hope I Die Before I get old…

Leave a comment

But if I don’t, I want a mobility scooter like this one!

Older Entries